Sharp MD-MT161E Minidisc Player
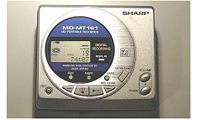
A few years ago I replaced my walkman with a minidisc player. This is the Sharp MD-MT161E, which takes two AA batteries and is capable of recording for two hours from a digital or analogue signal. It can playback for five hours or more to headphones or to the line input on a sound system. Although the minidisc player did not come with a remote control, the facility is available and it is possible to make a remote controller or to control the minidisc player via the parallel port on a PC using a minidisc control lead.
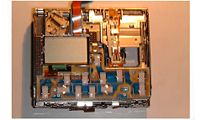
The photos below show the front of the minidisc player, starting with all the covers in place. The front hinges upwards to allow a minidisc to be inserted. The minidisc is then held in a steel frame, which is suspended inside the unit on rubber mounts with the reading and recording heads attached to the frame. The rubber mounts provide the mechanical first form of shock protection, and damp out small vibrations. This allows the reading and recording heads to continue tracking the minidisc while the unit is shaken (e.g. in a car or on the train).
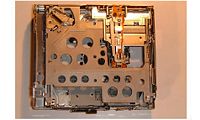
The second photo shows what is directly under the front cover. The screen and keypad are connected to circuit boards in the lower half of the unit via two ribbon cables. There is no disc inserted in these photos, so the laser head can be seen under the magnetic head to the right of the screen. This window in the steel frame aligns with the window in the minidisc, which is opened when the disc is inserted. The third photo shows the same view, but with the screen and keypad removed. The magnetic head rests on top of the minidisc during recording and forms a magnetic field around the area of the disc being written to. The laser reads and writes to the disc from below. During playback a weak laser illuminates the track on the minidisc, in the same way as a CD player does. The reflection from the disc passes back through the same lense and is separated by a prism onto a receiver. During recording the power of the laser is increased and the magnetic field is applied. The receiver is still used to make sure the track on the minidisc is being followed, as it must align with previous and following tracks.
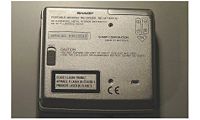
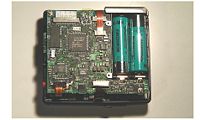
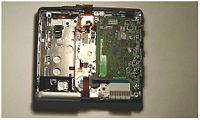
The photos below show the back of the minidisc player, starting with all the covers in place. The second photo shows what is directly under the back cover. At the top the three ribbon cables from the screen, keyboard and magnetic head can be seen, with the yellow power connector between them. The two AA batteries are to the right, with the audio connectors down the left hand side. The large chip in the centre of the board is the control chip for the minidisc player. It connects to the keyboard and screen, as well as the other main chips in the unit. Ribbon cables to the analogue board and the laser head connect to the bottom of the board, with the power control circuitry to the bottom right. The other side of this board is shown later.
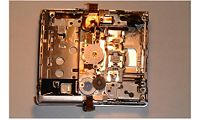
The third photo above shows what is under the digital board. The unit has been rotated so that the analogue board and audio connectors are to the right, and the gap to the left is where the AA batteries were. In the centre is the motor, which is used to spin the minidisc and move the heads. The laser head and magnetic head are connected through the hinge so that they are always aligned, and they can be moved across the disc using the worm gear under the analogue board. The magnetic head is lowered during recording by gears from the same motor, this action also locks the lid closed so that the minidisc cannot be removed before the buffer has finished being written and the table of contents (TOC) has been updated.
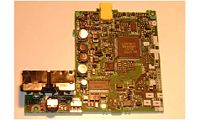
The first photo below shows what is under the analogue board. The back of the laser head can be seen, with the worm gear at one end. The teeth that mate with the worm gear are mounted on a spring, so that if the worm gear turns when the head is trapped, the teeth will not be damaged. The second photo shows the underside of the digital board. The springs for the AA batteries are in the bottom left, with a micro-switch between them. The switch detects if the special Sharp rechargeable battery has been inserted. If the switch is not depressed, then normal AA batteries have been inserted, and the minidisc player will not attempt to recharge them. I have fitted a black rubber sleeve over the switch so that it is always depressed. This allows normal rechargeable batteries to be charged by the minidisc player when the mains adaptor is connected.
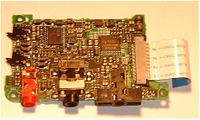
The round devices on the left side of the digital board are capacitors and inductors. These allow a stable supply of 5v to be generated from the AA batteries or the 4.5v mains adaptor supply connected to the yellow socket at the top. The large chip in the centre is probably the ATRAC encoder and decoder. The third photo above shows the under side of the analogue board. The chips are analogue to digital and digital to analogue converters. The red socket to the left is for connecting a microphone, while the black socket in the centre is the line input. At the back of the line input socket is an optical sensor, which reads digital signals sent via an optical cable (TOS link). The socket to the right is for headphones and can be used as a line output. The slots to each side are symmetric and are used by a remote controller. (e.g. the minidisc control lead).
One final point of interest is the Sharp MD-MT161E Service Mode. This can be entered by holding down Display and Enter, then pressing Play. Stop is used to exit the service mode. It is possible to navigate the service mode menus and change the contrast, bass boost levels and most other parameters. Needless to say, it is also possible to stop the minidisc from working altogether, and I haven't found a facility to 'Return to default settings'.
Links
- Sharp MD-MT161E Service Mode - A description of some of the service mode settings
- Minidisc control lead - A PC link lead for controlling the Minidisc player and titling minidiscs
- http://www.minidisc.org - Everything about the Minidisc system and technology
- ATRAC Compression - A particularly good page about the compression used by Minidisc systems
